
 Google Play
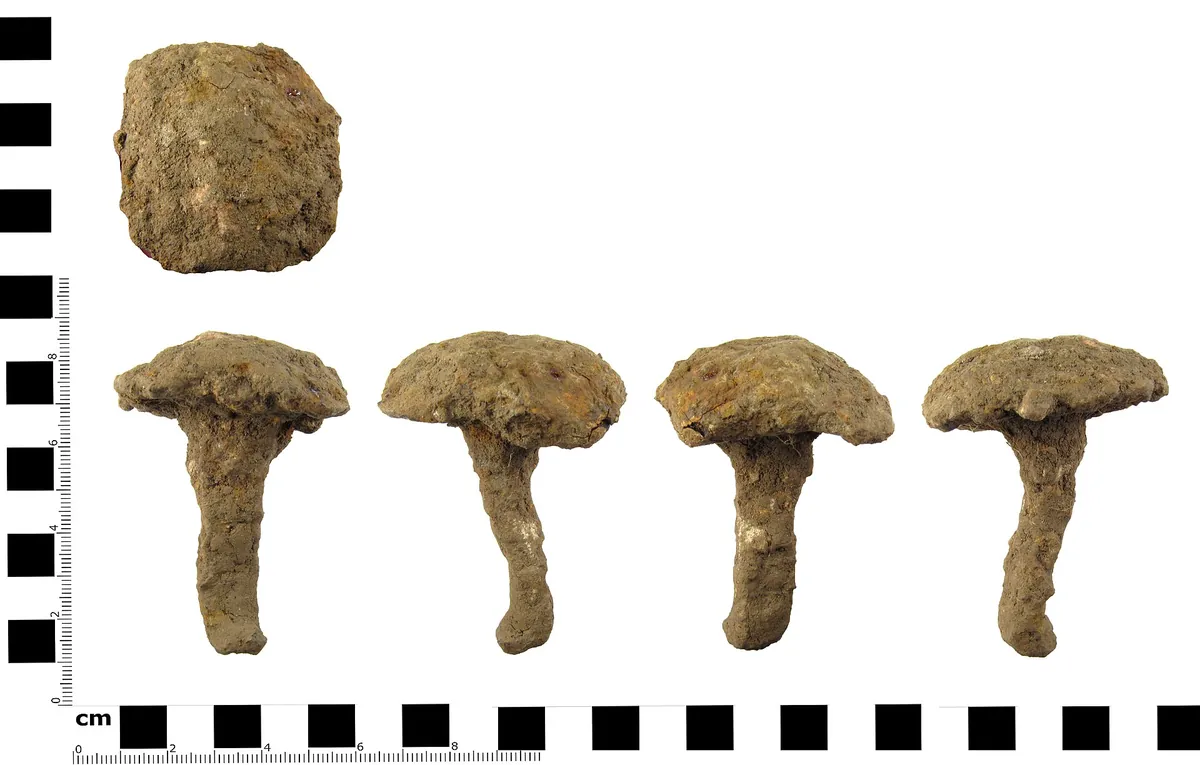
An iron find out of the ground is usually not an object but a lump of rust with something inside it. Sometimes there is a living core, sometimes sand and a void, and sometimes a nail you have just spent an evening on. Working out which before you start is close to impossible, and that is the central difficulty with iron.
The job comes in three steps: stabilise the metal, lift the loose oxides, and seal the surface immediately. Skip the third and two or three weeks later you are back at the first. The fastest practical way to lift loose rust is electrolysis, and it is walked through step by step below. But it is not magic and not a route to a mirror finish: you remove oxides under control, and then you are obliged to flush the salts and consolidate. If you have doubts about the whole exercise, start with restoring finds: the basics.
Before any method: three questions
- Has the material actually been identified? Colour and shine prove nothing about the alloy, about plating or gilding, or about whether this is a composite object.
- Is the original surface still there? Photographs, maker's marks, stable patina, organics, enamel, glass and thin plating can all be worth more than clean metal.
- Is there a stop signal? Wet organics, laminated glass, plating, bi-metal, loose active corrosion, an inscription, a dangerous object or a meaningful context all mean pause and a conservation route.
If even one of the three has no confident answer, do not move on to active cleaning, soaking, reagents or electrolysis. Start with the first 24 hours after a find and fill in a condition card.
First decide whether electrolysis is needed at all
An even orange colour tells you nothing about what is happening under the crust. Iron out of the ground is often weakened inside its own corrosion shell, and the salts left in its pores keep the process running whatever the surface looks like from outside. An object with a loose crust, cracks, possible organics or traces of plating is not automatically a "candidate for electrolysis".
If the aim is to stop deterioration rather than to produce a visually clean object, electrolysis is almost never the first step. The order runs differently:
- A condition card and photographs before any intervention.
- Isolation: the object kept apart from the rest, in a stable dry environment, with no "let it sit in a bucket of water for now".
- An assessment of salts and storage conditions — water, salts and hydrolysis.
- Observation with reference photos and inspection dates — preservation and monitoring.
- Only then a decision on method.
If there are signs of salts, or the object has already broken down a second time, treatment stops being a one-off procedure and moves into controlled conservation: a written plan, a conservation log and inspection dates. A significant, archaeological, composite or unstable object goes to a conservator. In every other case the method is not chosen from a single image found online: two nails that look identical can have different cores, different histories, and a very different cost of error.
Absolute exclusions: electrolysis is not a test and not a universal cleaning method
Do not use electrolysis on objects of unknown material, or on anything with plating, gilding or silvering, enamel, glass, stone, organics, adhesive, maker's marks, inscriptions, paint traces, composite construction, or a culturally significant context. Do not use it on archaeological finds, on suspected ordnance, or on any other hazardous object.
Electrolysis is irreversible. It can alter the surface, strip traces of plating and manufacturing evidence, break up a composite object, and leave you with a waste problem.
What electrolysis suits, and what it doesn't
| Suitable | Not suitable |
|---|---|
| Iron and cast iron with loose rust and a living core | Copper, bronze, silver, bi-metal |
| Nails, buckles, simple wrought pieces | Anything with organics: wood, leather, textile |
| Plain wrought iron with no plating and no markings | Plating, gilding, silvering, enamel, paint, a maker's mark, an inscription |
| Study and personal finds, after photo documentation | Rarities and museum-grade pieces without advice |
| An object with a known history and a filled-in condition card | Archaeological context, composite objects, anything culturally significant |
The test is simple: if the piece rings hollow and the core feels like sand, electrolysis will not bring the shape back — there is nothing left to recover. If you want a sense of what might be under the crust, AI cases will show you, on pixels rather than metal.
Safety
This section is not a formality. You have water, electricity and alkali in the same room.
- A current-limited supply — lab or adjustable. Not whatever laptop brick was nearest.
- A plastic tub only. A metal one is a short circuit waiting for an excuse.
- Gloves, eye protection, ventilation. Never short the electrodes.
- Don't leave the process unattended for long stretches.
- Check polarity before switching on, not after: the find is the cathode (negative), the sacrificial steel is the anode (positive). Get it backwards and instead of removing rust you start dissolving the find — within a single session.
Waste is part of the method, not an afterthought. Spent electrolyte, the sludge at the bottom, rust suspension, gloves and wipes all count as contaminated once the bath has run. Do not pour the solution down the drain or onto the ground, and do not keep it in an unlabelled container: let it settle, label the vessel (what, when, from which object) and dispose of it under your local hazardous-waste rules. Keep only as much reagent as the current job actually needs.
What you need
- A supply of roughly 12 V (6–12 usually does; current control matters more than chasing volts).
- Wiring with reliable clips.
- Electrolyte: washing soda in water. Start with a few tablespoons per litre and judge by how fast the bath darkens.
- An anode: a piece of ordinary steel. Not aluminium, and don't treat stainless as a universal answer.
- Distilled water for rinses.
- Soft brushes, wooden picks, a loupe.
- Silica gel, dry storage, and wax or oil for consolidation.
- A conservation log, on paper or on screen, and a labelled container for spent electrolyte and sludge.
Electrolysis step by step
1. Document
Shoot every angle, photograph the corrosion layers before the bath, pin the spot on the map and create the find card. Without a "before" you won't know what you lost. With iron the context is usually worth more than a tidy strip: a nail on its own says nothing, while a nail on the footprint of a former building says quite a lot.
The card has to outlive the job, not just start it: record the date, current and voltage, the length of each session, electrolyte changes, the number of rinses, and everything applied to the surface. Within a week memory loses to notes, and within a year it is not even close.

2. Mechanics before the bath
Remove only the loose material, with a soft brush. No angle grinder, no coarse paper into the core: the goal is to expose metal for contact, not to file the shape down.
3. Build the bath
- Dissolve the soda and stir until even.
- Suspend the find so it cannot touch the anode at any point.
- Place the anode opposite or around it; its area should be at least that of the find.
- Negative to the find, positive to the anode. If in doubt, check with a meter.
4. Short sessions
Bubbles at the cathode and a darkening solution are normal and expected. Change or filter the electrolyte once it is heavily fouled — into a labelled container, not into the sink.
Short sessions with an inspection between them beat "set it going overnight and forgot". Between runs, gently lift the loosened rust and rinse.
5. Desalination — the part everybody forgets
After electrolysis the metal looks finished, but chlorides remain in the pores. That is a deferred problem: under a coat of wax they will happily wait for moisture and restart the corrosion where you won't even see it.
There is no single "rinse and dry" regime that fits every iron object equally. Long baths are meant for solid, uniform iron with no plating, no organics, no glued fragments and no delaminating core. For a thin-walled casting, a layered crust or a composite object, the same weeks in water are not desalination but one more cycle of damage; the mechanism is set out in water, salts and hydrolysis.
If the object clears that filter, flushing the salts out is slow and dull:
- Long soaks, or gentle boiling, in distilled water with the water changed repeatedly.
- The aim is to reduce chloride content, not to give it a rinse.
- A full dry: warmth and air, and for larger pieces more patience than you expect. Don't blast it dry and don't put it away in a damp box.
The stopping point is not a date in the calendar: change the water until a fresh change stops picking up a noticeable amount of salt. If that never happens and orange spots return after every drying, the task is no longer a rinse. It is controlled conservation, with a plan, a conservation log and scheduled inspections, and it is answered by observation and advice rather than by a longer bath.
6. Drying and consolidation are not optional
- Dry iron, then tannin, or straight to a thin film of oil or microcrystalline wax.
- Dry storage; silica gel in the box does no harm.
- A reference photo, a date for the next inspection and a note of where the object is kept. Fresh orange spots mean drying and sealing again, not "a bit more acid".
Without this step the previous five were a rehearsal. Barriers and the monitoring routine are covered in preservation.
Tannin
Tannin forms a more stable dark film on cleaned iron. It is hobby- and field-level conservation, but it works: apply to dry, clean iron per the product's instructions, then top with oil or wax.
Museum protocols are more involved, but for an everyday find the outcome is decided by two simple things — dryness and a moisture barrier.
Other options, briefly
Gentle wet mechanics will do for loose crust where electrolysis is overkill. Commercial rust converters are acceptable as a short, timed soak followed by a rinse — leave them too long and they scorch the surface. Heating to red heat, though, is best left on the internet: the crack risk is high, and for thin or hollow castings it is close to a guaranteed ending.
Five ways to ruin it
- Putting copper or silver in the bath "because it's faster". The patina and the alloy won't survive it.
- Letting the anode touch the find, which gives you a local burn.
- Skipping desalination. The rust comes back in about a month.
- Chasing a mirror finish. The surface history goes out with the rust.
- Working with no photos and no notes, so there is nothing to roll back to.
In short
- Stop signals checked, a condition card and "before" photos exist.
- Polarity and electrode isolation checked before switching on.
- Short sessions with inspections, not "overnight".
- Distilled water and desalination — do not skip, but match the regime to the object.
- Dry, then tannin, oil or wax; dry storage and the occasional look.
External orientation
Iron is more demanding about storage than any other metal here. For stabilisation and microclimate see the metals section at Canadian Conservation Institute; home electrolysis is not a substitute for lab conservation. If the object looks like a weapon or a significant artefact, stop and read what to do with such a find and what the law says.